Upload the PDF to Postmarkr from your phone or computer and skip the printer. You create an account first, then add the US addresses; the preview and the total show before you pay. If you can get to a copy shop, printing it yourself costs about half as much in cash; libraries set their own charges. Both routes are below.
Choose by what has to happen after printing. If you need to sign in ink or add something physical, such as a check, get the pages into your hands. If a printed copy is fine, the online route starts from the PDF: we print it the next business day and mail it First-Class, and USPS lists a delivery window of 1–5 days (opens in new tab) after that. The provider instructions below were checked October 25, 2026; the Chicago library and Colorado café are local examples, not reports of in-person print tests.
Mail it online without printing anything#
Here is the online route on a phone; on a computer the steps are the same and the screens are wider. You need the final PDF, both US addresses and a way to pay. If your letter is still in ChatGPT, use the ChatGPT-to-PDF mailing guide to prepare the file before uploading it.
1. Upload your PDF#
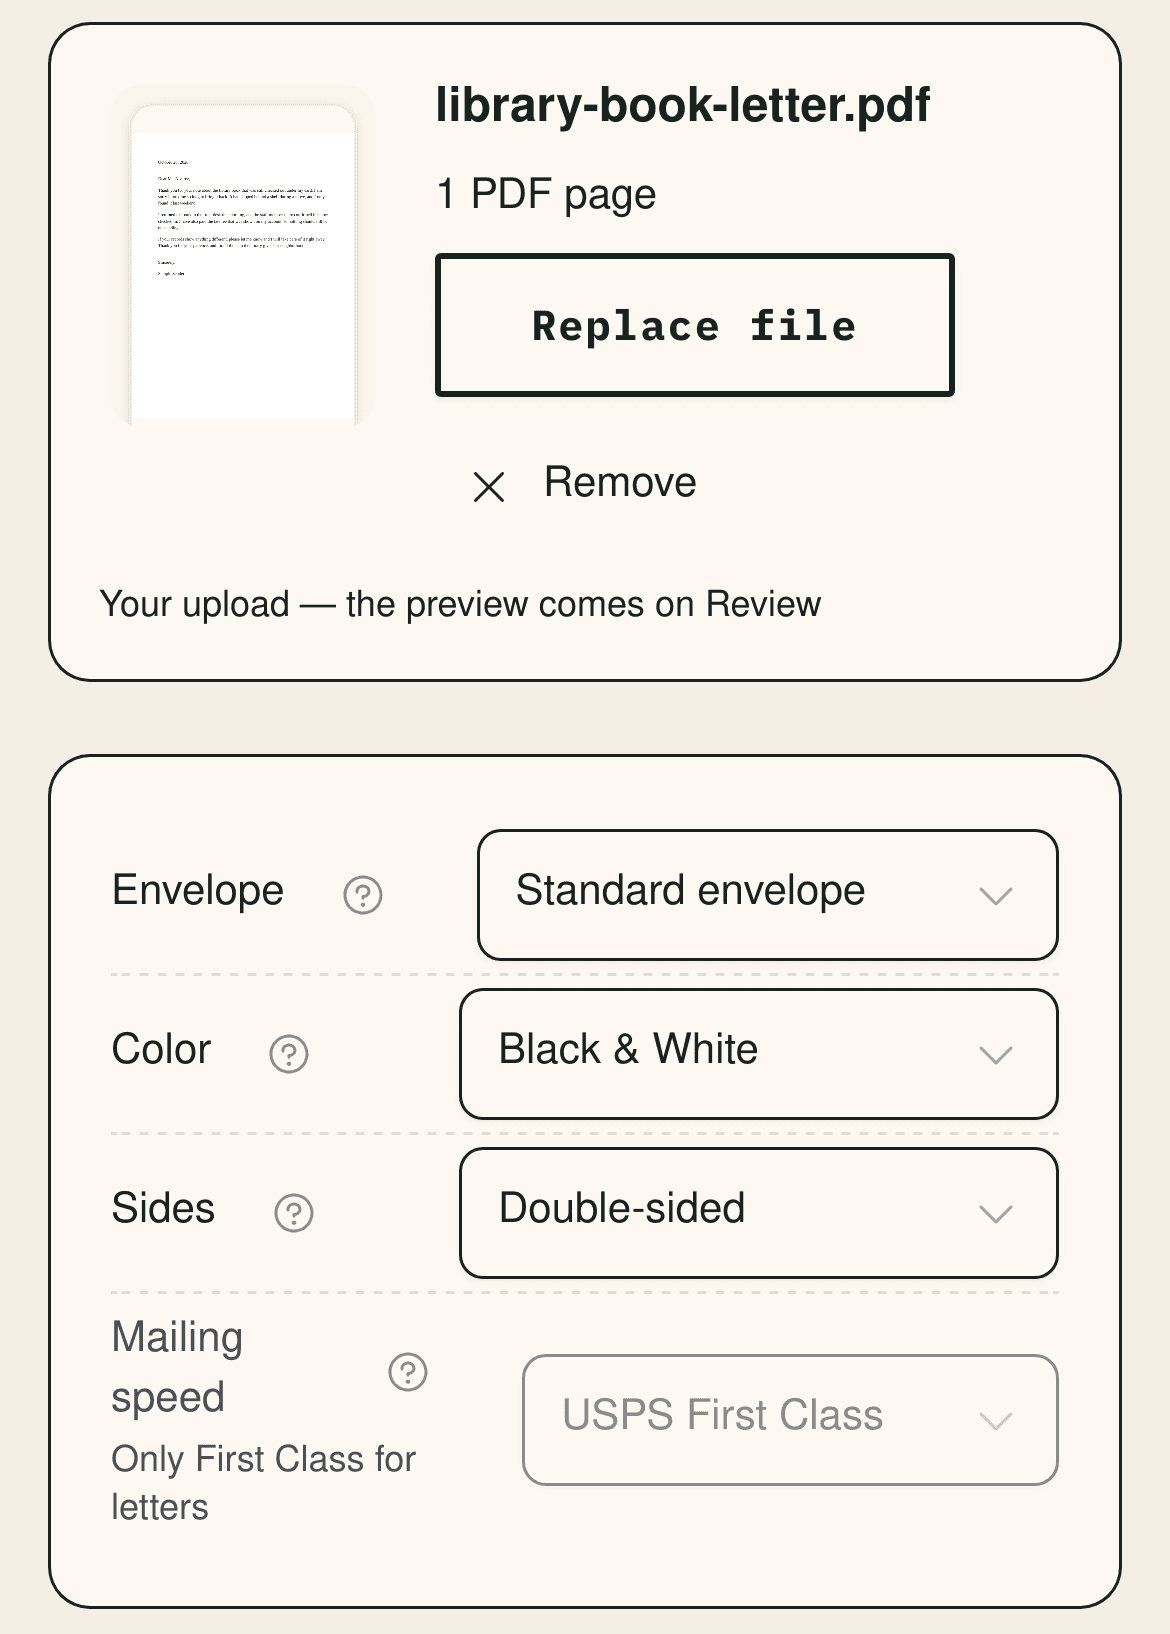
Sign up with Google, or with an email and password (we email you a 6-digit code to confirm it), and you land on the upload step. Pick your file with Choose letter PDF; it takes one US Letter (8.5″ × 11″) PDF, up to 50 pages and 5 MB. Leave Color on Black & White. After the upload, the bar at the bottom shows the price.
2. Add both addresses#
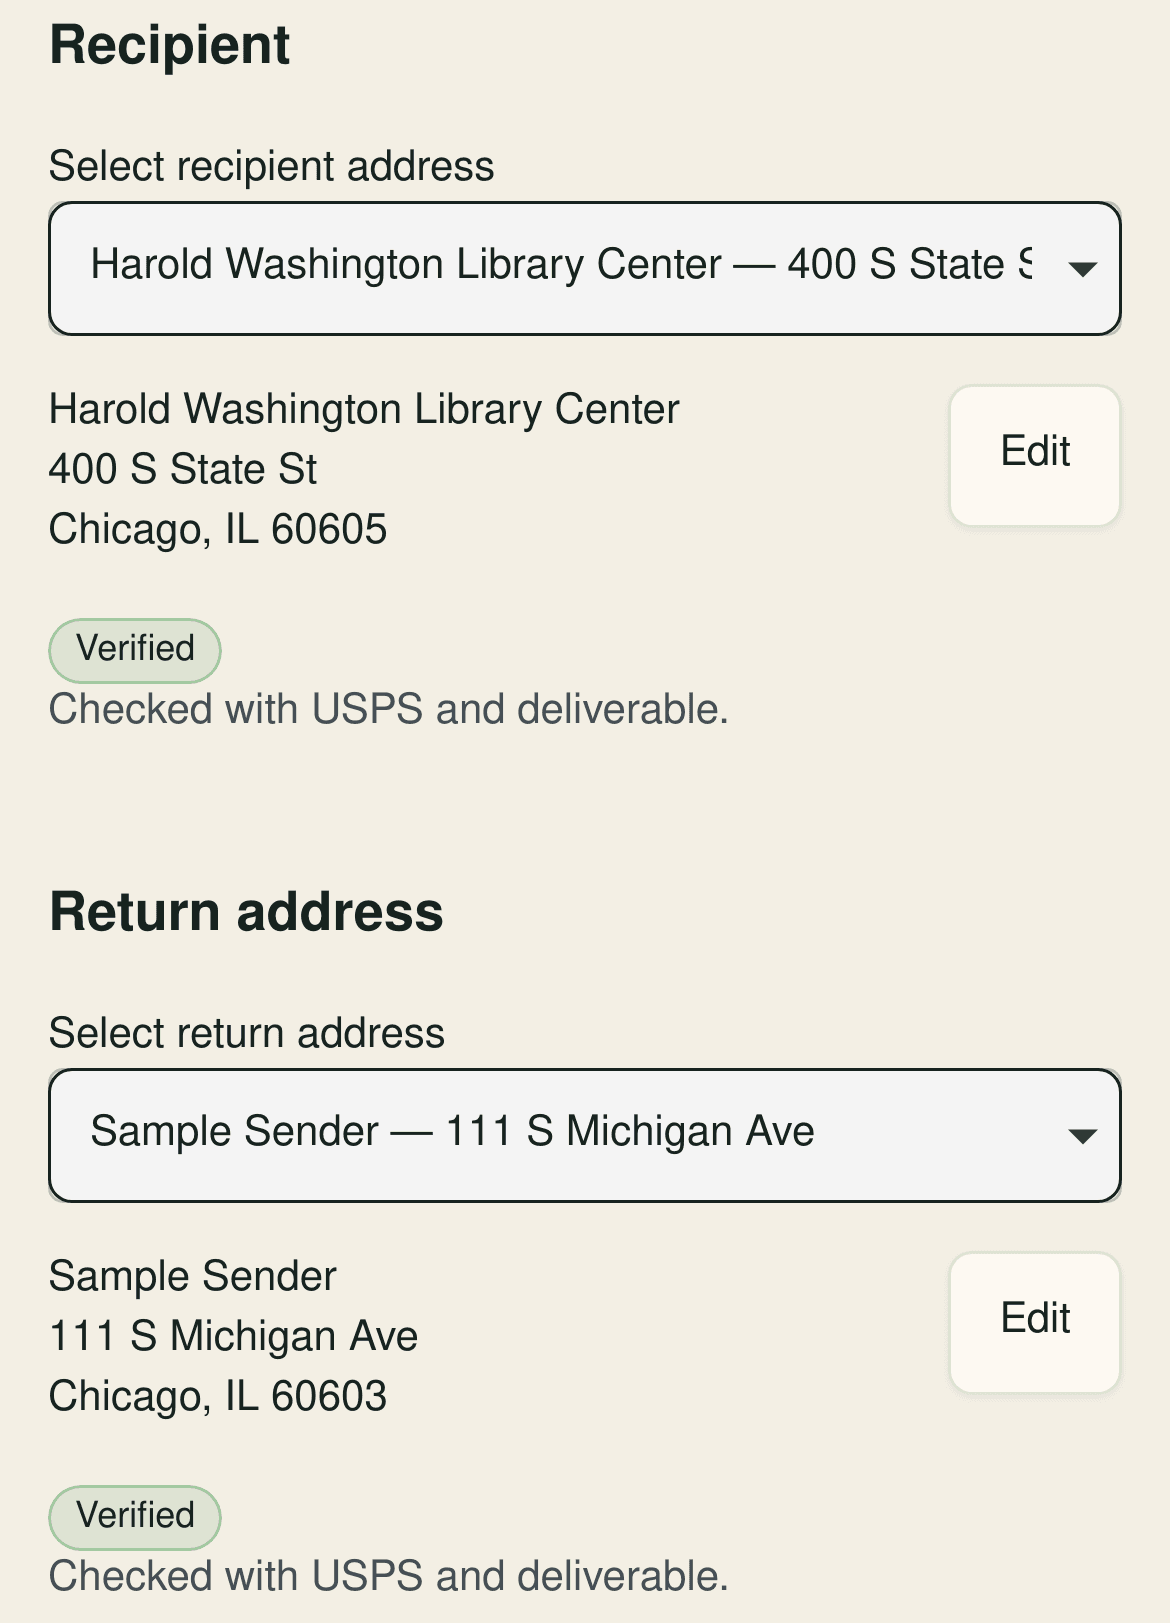
Fill in the recipient’s US address and your US return address, and tap Save and verify. Postmarkr checks both for USPS deliverability before you pay, and a checked address is marked Verified. If you see a warning about a missing apartment or suite number, add it if the address has one, or choose Send as is if it doesn't. If an address says Not verified, tap Check address.
3. Check the price and the preview#
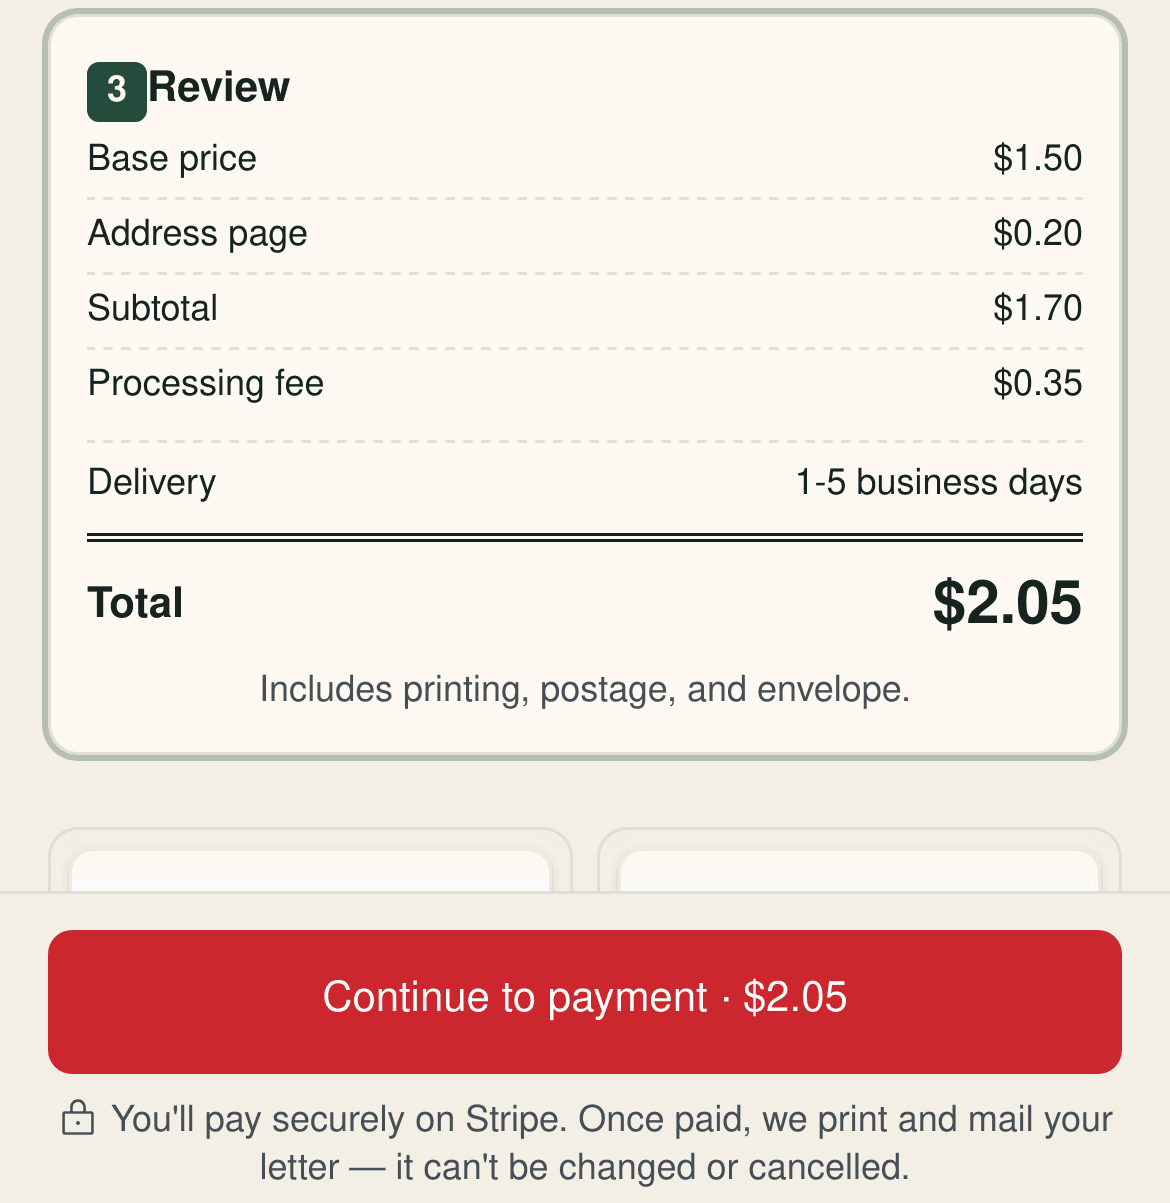
On Review, the preview starts with the address page and then shows your own pages; open any of them full size, or download the whole preview as a PDF. Postmarkr adds a separate address page. With a two-page PDF, check that both content pages and the address page are correct. For a one-page black-and-white letter the total is $2.05, covering printing, the address page, the envelope, First-Class postage and the processing fee. The payment button repeats it.
4. Pay on Stripe#
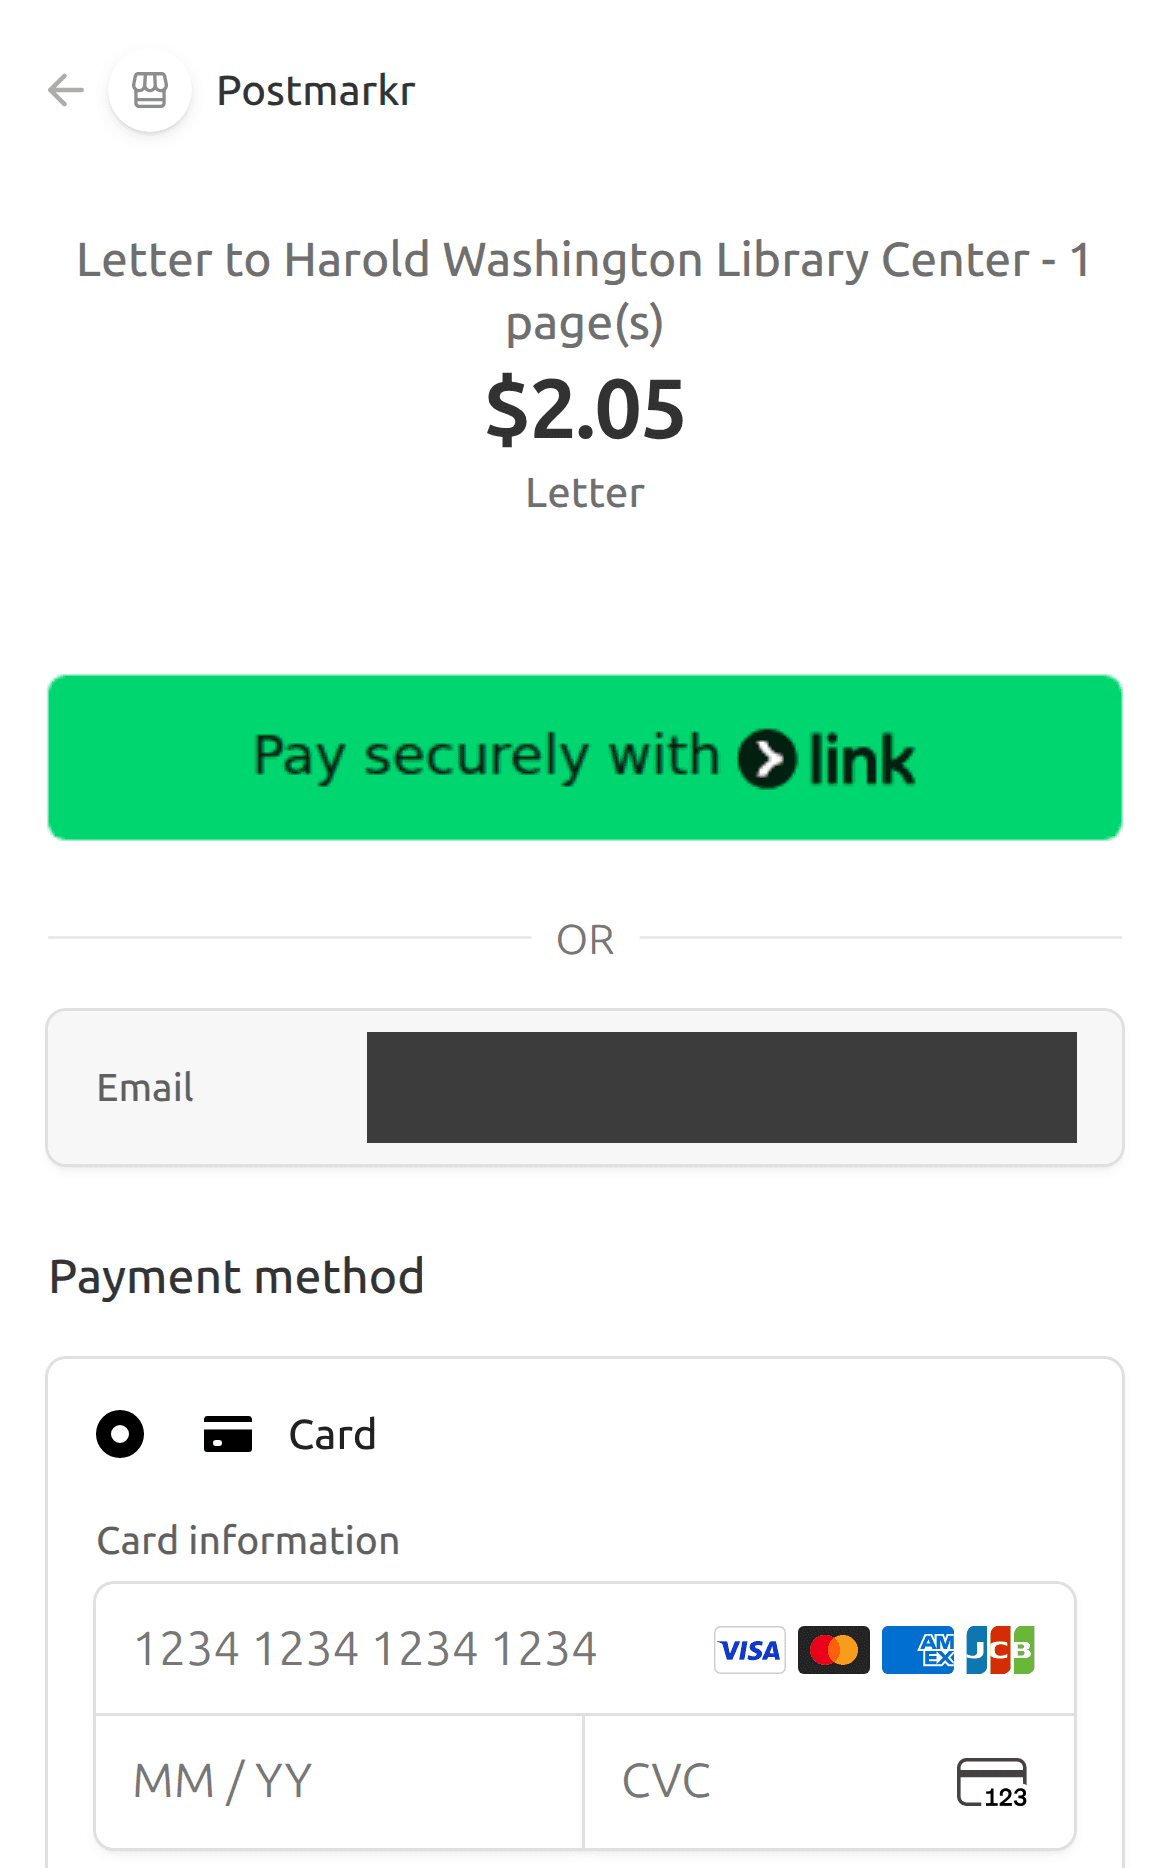
Continue to payment takes you to Stripe’s checkout page, and nothing is charged until you pay there. From that point the letter is final: it can’t be edited or cancelled. We print it the next business day and send it First-Class.
Making the PDF on a phone, from scanning paper to fitting a page to Letter size, is covered step by step in how to send a letter from your phone. On a computer you can also type the letter in Postmarkr’s letter editor or import a Word file; editing needs a desktop or laptop.
If you're mailing it under your executive's name, our page for executive assistants covers whose return address goes on it and the record you keep.
Considering postage software instead? Our Stamps.com comparison explains the difference between printing your own postage and having a service print and mail the letter for you.
What this route can’t do#
- Certified Mail or a USPS receipt. Postmarkr mails First-Class letters only. How to mail a signed contract shows how to tell which service a recipient wants.
- Addresses outside the US. Both addresses have to be in the US. Mailing from abroad? Compare international post and US online mailing.
- An original. It can’t carry an ink signature, a notarized page or an enclosure such as a check.
- Checkout without an account. You sign up before you upload; there is no guest checkout.
- Mailing today. We print the next business day; paying doesn’t mean USPS has the letter yet.
Will your PDF print right? Check these before you upload#
A file can look fine on screen and still print wrong. Whether you upload it or print it at a library or shop, check:
- Page size. Prepare a US Letter PDF for Postmarkr. If an eligible A4 file triggers a fit-to-Letter offer, inspect the fitted preview before using it. If fitting is unavailable or unsuitable, export a US Letter copy yourself. For local printing, choose the paper size and scaling deliberately and check for clipped text.
- Fonts. Export with embedded fonts where possible. If Postmarkr reports an unsupported unembedded font, re-export from the source document or create a print-ready PDF copy, then check the result. Not every unembedded font triggers rejection, and re-exporting is not a substitute for inspecting the preview.
- Completed form fields. Check that every answer appears in the print preview. If fields disappear, create a separate printable copy with the completed values visible, reopen it and compare it with the original.
- Signatures. Confirm the recipient accepts the printed copy. Preserve the original signed file; a flattened print copy does not preserve an electronic signature’s verification. If the request requires original ink, print locally and sign the paper before mailing.
- One readable file. Combine the intended pages into a PDF within the upload limit shown. Use an unencrypted copy you are authorized to print. Check scanned pages at a readable size: reducing file size must not make small text or signatures illegible.
- The last look. Read the preview page by page. Check page order, form answers, signatures and the address page. If something is missing, stop and correct the file before paying.
What printing it yourself costs#
In cash, a copy shop costs about half as much: at published starting prices, one black-and-white page and a First-Class stamp come to about $1.00 to $1.16, plus an envelope, against $2.05 for Postmarkr.
One letter, printed and mailed
Option | One black-and-white page, mailed | What’s left for you |
|---|---|---|
Postmarkr | $2.05, including the address page, envelope and First-Class postage | Upload, add the addresses, check the preview and pay |
Office Depot / OfficeMax | from $0.18 + $0.82 stamp = from $1.00, plus an envelope | Get to the store, print or collect the page, then address, stamp and mail it |
FedEx Office | from $0.23–$0.24 (two store pages) + $0.82 stamp = $1.05–$1.06, plus an envelope | The same |
Staples | from $0.34 + $0.82 stamp = from $1.16, plus an envelope | The same |
The UPS Store | No published price; each store quotes its own | The same, unless the store’s quote includes mailing |
Your library | Set by the library; Chicago’s includes a daily allowance | The same; check the pickup window too |
Prices checked September 30, 2026: Office Depot / OfficeMax (opens in new tab), Staples (opens in new tab), and FedEx Office (opens in new tab) store pages for Dallas (opens in new tab) and Seattle (opens in new tab). The UPS Store (opens in new tab) does not publish a per-page price.
At the store, price the whole job, including any minimum or first-page fee. The copy-shop route also leaves you the trip, the envelope, the stamp and a mailbox before the last collection. The online route trades those for the $2.05: we print the letter, add the envelope and postage, and mail it, after checking both addresses for USPS deliverability. Your account shows its processing milestones, plus USPS scans when available. More pages or color change the Postmarkr total; pricing lists each option.
Use the USPS letter guide (opens in new tab) to check the finished envelope’s size, weight and postage. An enclosure, heavy paper or an unusual envelope can change the amount.
Choose local printing when you need the paper in your hands. For a batch, compare per-piece mailing costs; for several different letters, see sending multiple letters at once.
Try your library first, especially for a short letter#
Search for your library system's name plus “mobile printing” or “print from phone.” Open the library's own website. Look for the upload link, pickup instructions, charges, and whether you need a library card or can use a guest pass.
You may be able to submit the file before leaving home. Check the pickup window first: sending a file tonight is not useful if the job expires before you can collect it tomorrow.
If the letter arrived by email, download the attachment and check its pages. To print the email itself, use Gmail’s print command (opens in new tab), or save it as a PDF from Chrome’s print preview (opens in new tab) and check the page count before submitting it. Gmail confidential mode can prevent printing.
A concrete example: Chicago Public Library#
Chicago Public Library's printing instructions (opens in new tab) let you send documents from your phone or computer and collect them at any CPL location:
- Upload: use the library's linked ePRINTit upload page (opens in new tab). Choose this route for double-sided printing.
- Email: send the document to
mobileprinting@chipublib.org. This route supports single-sided printing. - Collect: follow the email or text instructions at a library Print Release Kiosk, using your library card number or release code. Plan to collect on the submission day: CPL says mobile prints may not remain available after that day. Check the branch’s printing cutoff as well as its building hours.
CPL publishes separate charges for single- and double-sided sheets, with a daily printing allowance. Check the current amount on its printing page and whether you have already used the allowance. Printing beyond it is cash-only; color printing is not available. A daily computer guest pass is available if you do not have a CPL card.
For a short letter, check the finished print total against any remaining allowance before releasing the job. Printing the pages does not supply the envelope, postage or postal handoff.
That example is specific to Chicago. Another library may use a different upload system, require a card, charge for every page, or offer color. Check the rules for the branch you can actually reach.
Look for a PrintWithMe printer in a café#
A coffee shop can be a printing stop even when it is not a copy shop. PrintWithMe operates self-service printers in cafés and other locations. Use its public printer map (opens in new tab) to find one near you. Its location guidance (opens in new tab) distinguishes public retail printers from private apartment-building amenities; a printer in a residential building is not automatically open to visitors.
Open the individual location page before setting out. Confirm the address, opening hours, available services, and that location's rates. Then follow its upload or email instructions. PrintWithMe's current workflow provides a release code after payment; you enter that code at the printer to produce the pages.
Use the email address for your chosen printer. A saved address from an earlier visit may send the job to a different café. Keep the payment confirmation and release code accessible on your phone.
Check the first-page price, not just the extra-page price#
For example, Bardo Coffeehouse in Wheat Ridge, Colorado (opens in new tab) publishes separate first-page and additional-page tiers. Open its current location page, choose black-and-white or color, and check the charge for the complete job before paying. A per-page figure for later pages does not price the first page.
The Bardo listing was checked October 25, 2026. Use the same check at your own location: opening hours, printer availability, the full print price and any checkout charges. One café’s rate is not a network-wide rate.
A café printer solves the paper part of the task. Plan to bring an envelope and postage or make a separate mailing stop. Do not assume the café sells stamps or accepts outgoing mail.
Use a print shop when you need another way to submit the file#
Decide whether to use a self-service machine or place an order for pickup. Their prices and completion arrangements can differ even within the same chain. Select the actual store and check the complete quote before submitting the file.
Staples: email the file and enter the code at the printer#
Staples self-service printing (opens in new tab) takes a file by email, so you can send it from your phone:
- Attach the finished file to an email addressed to staples@printme.com.
- At a Staples self-service printer, choose Print, then Email, and enter or scan the confirmation code from the email Staples sends back.
- Check the print settings before printing. Inspect every page before leaving.
You can also order Staples document printing online for store pickup (opens in new tab). Choose your store, paper and print settings, then check the quote and offered pickup time. At a self-service printer, check the machine’s price before releasing the job. Either route produces the pages; arrange the envelope, postage and mailing separately.
FedEx Office: email the PDF and bring the retrieval code#
FedEx Office Print & Go (opens in new tab) gives you a route from your phone to a self-service printer without creating an account:
- Attach the finished file to an email addressed to
printandgo@fedex.com. - Wait for the retrieval code before traveling; check your spam or junk folder if it does not arrive.
- At a FedEx Office location (opens in new tab), choose “Print from Retrieval Code” on the self-service machine and enter the code.
- Check the print settings and price before printing. Inspect every page before leaving.
FedEx Office machines also accept a USB drive or supported cloud account. Check your retrieval code’s expiry before visiting. Printing prices vary by store, so use the selected location’s current price rather than another branch’s starting rate. Card payment involves a preauthorization; read the machine’s posted amount before accepting it.
Choose a FedEx Office with printing, rather than assuming every location carrying the FedEx name has a document printer. Arrange mailing separately unless the particular location confirms it can handle your requested service.
Office Depot and OfficeMax: print from email, upload in store, or order ahead#
Office Depot and OfficeMax self-service printing (opens in new tab) accepts files from email or an in-store upload. Its print-from-email address is officedepot@printme.com; follow the response and machine instructions. You can also order document printing for pickup (opens in new tab). Check the selected store’s total and pickup promise before submitting; a printing order does not establish postal handoff.
Office Depot sells postage stamps and offers mailing and shipping services (opens in new tab). Confirm whether your location can accept the exact letter service you need; buying stamps is not the same as having the printed letter mailed.
The UPS Store: ask for printing and mailing in the same quote#
The UPS Store lists USPS stamps and First-Class Mail services (opens in new tab), so it is worth asking whether a local store can finish both printing and mailing. Its document-printing guidance directs you to the store for a quote; locations are independently operated and services vary.
The UPS Store offers document printing (opens in new tab) and can accept electronic files, but services and file-transfer arrangements vary by location. Contact your nearest store (opens in new tab) with a specific request:
Ask the shop for the complete job
I have a PDF on my phone. Can I send it to this location for black-and-white, single-sided printing? I need to inspect and, if necessary, sign the pages before sealing them. Can you also supply an envelope and mail it using the service I need? Please confirm the total, file-submission instructions, pickup time and mailing cutoff.
Adapt the request with your page count, recipient address and required mailing service. This separates a print-only quote from the complete job. Get the location’s file-submission instructions rather than emailing a general corporate contact, and inspect any required signature before the envelope is sealed.
Will USPS print the letter at the Post Office?#
USPS Label Broker prints eligible shipping labels. It is not a service for printing the PDF letter you want to put inside an envelope. Its QR-code instructions concern a shipping label for a prepared package. See the USPS Label Broker explanation (opens in new tab).
The UPS Store and the U.S. Postal Service are different organizations. A UPS Store's document-printing service does not mean a USPS Post Office offers the same thing. For this task, arrive at USPS with the letter already printed, or use a service that prints and mails it for you.
Before you leave the printer, finish the mailing plan#
Save yourself a second trip:
- Inspect the paper. Every page should be present, readable, and in the right order. Sign before sealing if an ink signature is required.
- Have the addresses available. Include apartment or suite details. The envelope-addressing guide shows where to put them.
- Bring an envelope and pen. If you already have stamps, bring those too. Check postage for the finished piece rather than the PDF's page count alone.
- Check the last collection time. An open building or accessible collection box does not mean another collection happens today. Use the USPS locator (opens in new tab) and check the posted details at your chosen mailing point.
- Keep the right record. A printing receipt records a print purchase. If you need a USPS mailing record, decide which extra service (opens in new tab) you need before dropping the letter into a collection box.
If you use a shared computer, sign out of your accounts and remove any files you saved there. Keep your own final PDF so you can refer to exactly what you sent.
Once your pages are ready, the step-by-step guide to sending a letter covers preparing the envelope, checking postage, and choosing where to mail it. Already printed and stamped? You can mail it without going to the post office.