PDF already on your phone? Upload it to Postmarkr in the browser; there’s no app to install. You create an account, choose the file and add the US addresses, and you check the preview and the total before paying. Still on paper, or in Pages, Word or Google Docs? Make the PDF first with the steps below.
Postmarkr prints the PDF, adds an address page, and mails the letter with First-Class postage. Use this route when the recipient accepts a printed copy; an original ink signature or physical enclosure needs a route that carries the original paper.
Start with the file you have. A downloaded PDF, paper scan, typed letter and screenshot need different preparation, but each should end as a readable US Letter PDF you can find again on your phone.
What you need#
- The document: a paper page, a PDF, or a letter typed in Word, Pages or Google Docs
- The recipient's full U.S. mailing address. For a business notice, use the address named in the contract or lease's notice clause; it may not be the address the company works from.
- A usable US return address you are authorized to use.
- A Postmarkr account, made with Google or with an email and password, and a way to pay, such as a card
What are you starting with?#
Choose your starting point, then follow the matching steps below.
Start with the document you have
Starting point | Make the upload-ready PDF |
|---|---|
A saved PDF | Download the actual file; check every page and any password protection. |
Paper you can scan | Scan all pages into one PDF. Sign first if a printed scan of your signature is acceptable. |
A typed letter | Set US Letter paper before exporting a PDF. |
Only a photo or screenshot | Put the image on a Letter-sized document page, then export; inspect legibility and cropping. |
A PDF you already have#
On iPhone: in Mail, touch and hold the attachment, tap Save to Files, and choose a folder you'll find again.
On Android, download the PDF attachment from your email app. Use the save location shown by the app; look in Downloads or your Files app if you need to find it again. Open the saved file before uploading it.
Check that the saved PDF is the final version and contains every page. If it needs filling or signing, keep an untouched copy. A file’s appearance does not tell you whether it contains interactive fields, annotations or digital-signature data that can prevent automatic page fitting.
A paper document#
Lay the page on a flat, dark surface in even light so your phone can find its edges, and watch for glare. Scan every page in the same session so you end up with one PDF. If the page needs your signature, sign it in ink before you scan, and you can skip the phone signing steps below.
On an iPhone with Preview, open it and tap Scan Documents (opens in new tab). Capture each page, use the thumbnails to crop or rotate, then tap Done to create the PDF.
In Notes (opens in new tab), open a note, tap Attachments > Scan Documents, and capture all pages. Share the scan from its own PDF menu (opens in new tab), then save it to Files. Avoid exporting the whole note: Apple warns (opens in new tab) that this includes only the first page of a multipage scan. Reopen the saved PDF and check its page count.
On Android, open Google Drive (opens in new tab), tap Camera, and capture the page. Use Add for the remaining pages, then Done. Name the file, select .pdf rather than .jpg, choose its location and tap Save.
A scan is not necessarily US Letter size. Check the upload result rather than assuming that scanning a Letter sheet produces a Letter-sized PDF.
A letter you typed#
Set the paper size to Letter, then export a PDF.
In Pages on iPhone, use More > Document Options > Document Setup and choose Letter. If needed, open the Document tab to find the paper-size control. Then use More > Export > PDF. Apple documents the paper-size settings (opens in new tab) and PDF export (opens in new tab).
In Google Docs, switch out of Pageless if necessary. Use More > Page setup > Paper size and choose Letter; on Android, tap Edit first. Google’s Android (opens in new tab) and iPhone (opens in new tab) instructions show the controls. Export or send a copy in PDF format, then save that file.
In Word on your phone (opens in new tab), use the three-dot menu > Export > PDF on iPhone. On Android, use File > Print, select Save as PDF, and save the file. Check the resulting page layout; exporting alone does not change A4 paper to Letter.
Reopen the PDF and check that the last line or your signature hasn't moved onto a page of its own.
A photo or screenshot#
A screenshot or photo may be sideways, cropped or saved with an unsuitable page size. Renaming an image file with a .pdf ending does not convert it.
If you still have the paper, scan it instead. If all you have is the image, put it on a Letter page: in Pages or Google Docs, set the paper size to Letter, insert the photo, and export a PDF.
Fill in and sign it on your phone#
Skip this section if nothing needs filling in or signing, or if you signed the paper before scanning it.
On iPhone, you can sign a scanned document in Notes: open the scan, tap Markup, then Add > Signature. Position the signature and save. Apple’s scan-and-sign instructions (opens in new tab) show the steps.
Google Drive supports filling compatible PDF forms (opens in new tab). For filling and signing on either phone platform, Adobe Acrobat (opens in new tab) offers Fill & Sign and Signature > Add signature. Check the placement before saving: Adobe says saved signatures are permanent. Keep your unsigned source so you can correct a mistake without starting from a locked signed copy.
A signature added on your phone prints as part of the page. If the recipient asks for an original ink signature, a printed copy can't provide one; mail the signed paper instead. Signing for your boss rather than yourself? Read how to sign a letter on behalf of your boss.
Check the PDF before you upload#
A file can open on your phone and still print badly. Take a minute to check:
- Every page is there. Count them against the paper or the original file.
- Nothing is cut off. Look closely at signatures, dates, checkboxes and text near the edges.
- The pages are upright and in order. Rotate or reorder before you upload.
- The text is sharp. If small print looks blurry on your screen, scan it again in steadier light.
- It is a PDF within the upload’s file-size and page-count limits. If a scan is too large, reduce its image quality only as far as the small print stays readable. Reopen the new file and check every page before using it.
- The filename is clear. Signed_Lease_Notice_Oct_2026.pdf is easier to pick out of a file list than Scan_0042.pdf.
Upload, address and pay#
The rest happens in your phone's browser. The screens below are from the Postmarkr send flow; on Android the steps are the same and the file picker is Android’s own.
1. Create your account#
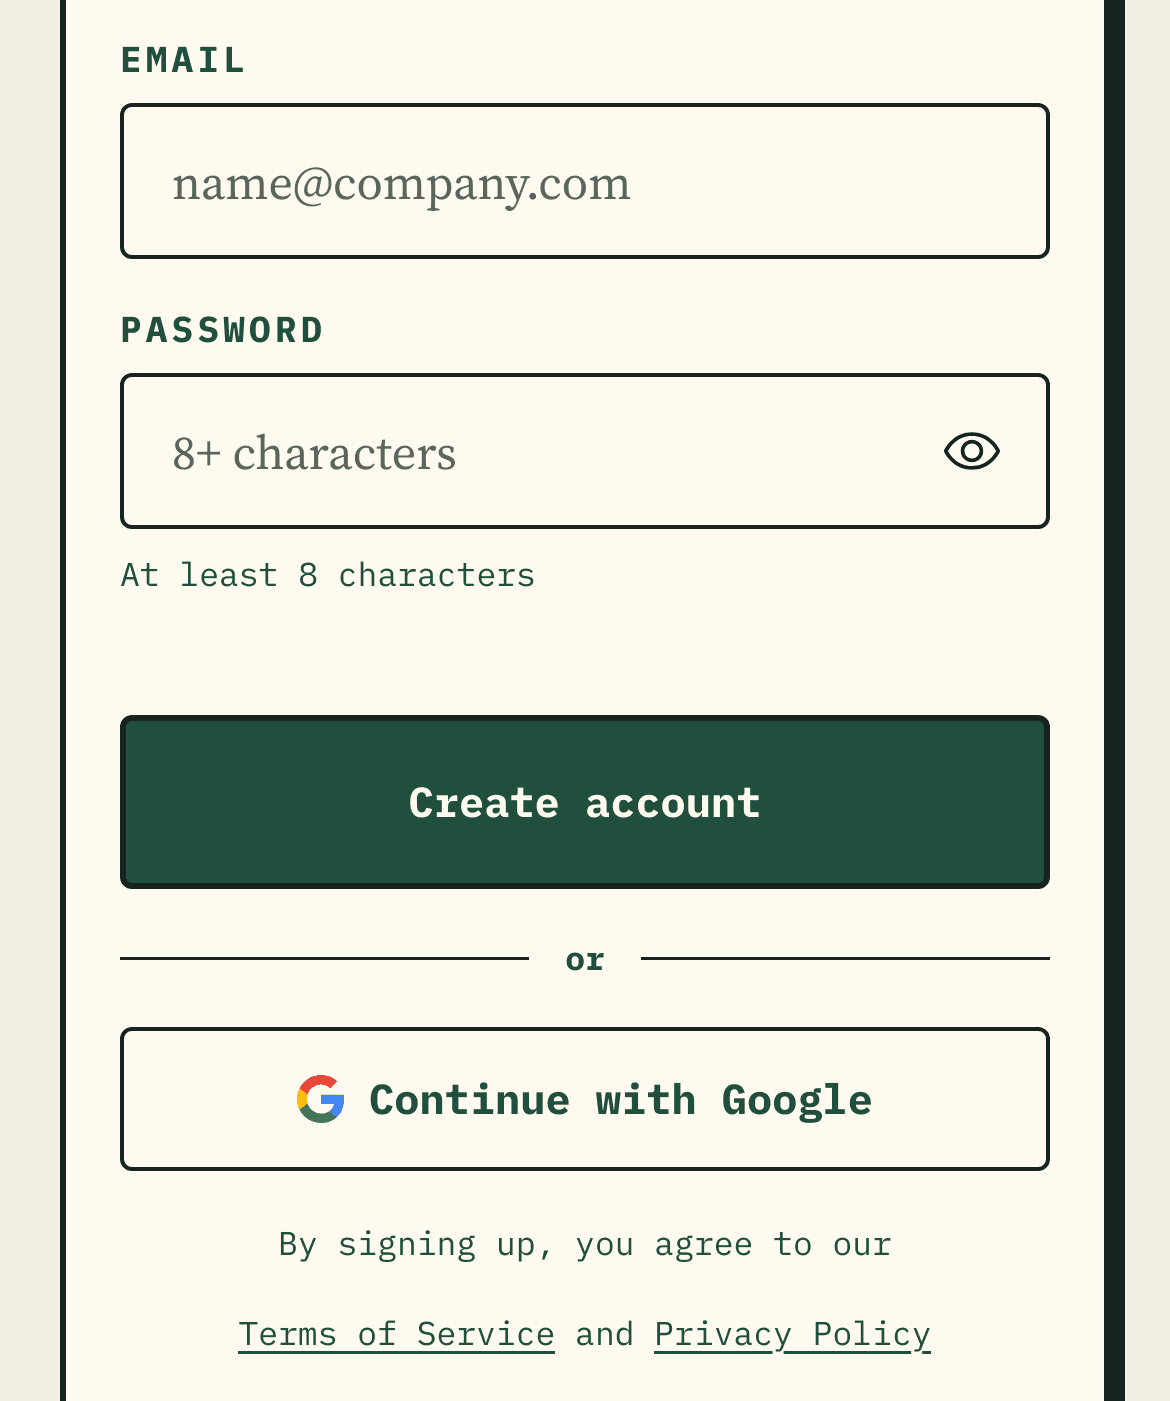
Open Postmarkr’s upload page. Create an account with Google, or with an email and a password. If you use email, we send a 6-digit code to type in; the email also has a link that works for 24 hours. The upload screen opens next.
2. Upload the PDF#
Tap Choose letter PDF and pick the file from Files, Downloads or Google Drive. The screen lists what it accepts: a US Letter (8.5″ × 11″) PDF of up to 50 pages and 5 MB.
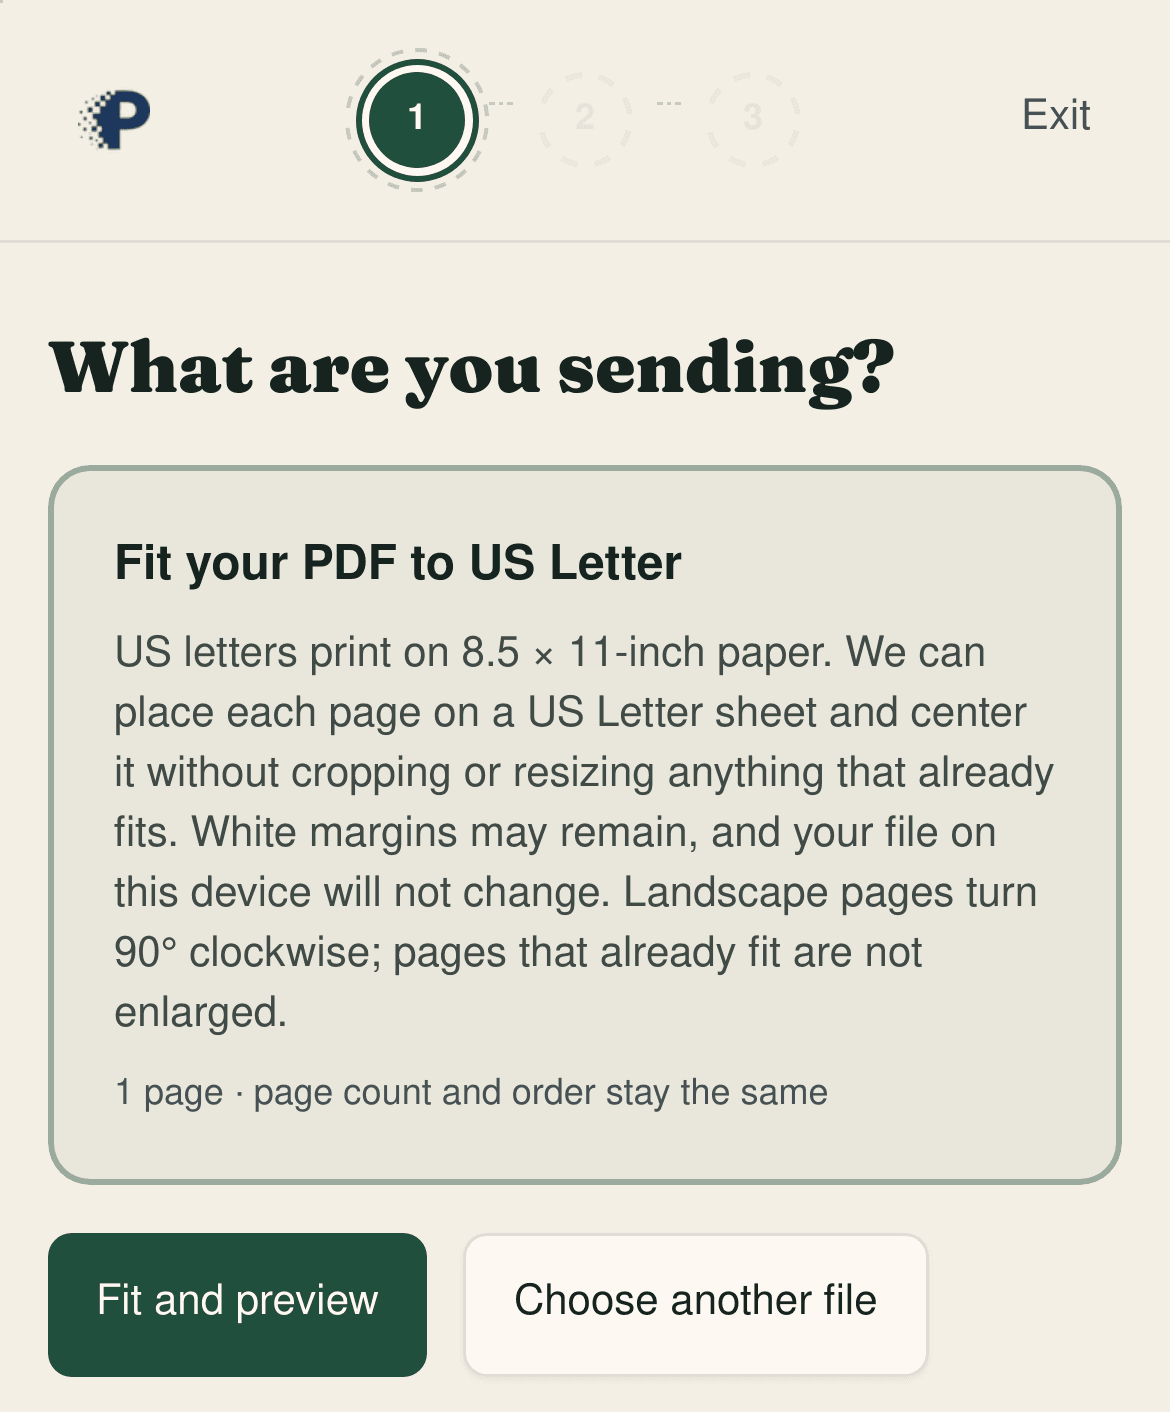
A phone scan often isn’t exactly US Letter size. If the upload offers Fit your PDF to US Letter, tap Fit and preview and check the fitted pages, especially small print, edges and signatures. Fitting is offered only for eligible files; if it isn’t offered, remake the PDF at Letter size using the choices above, or ask the sender for a Letter PDF.
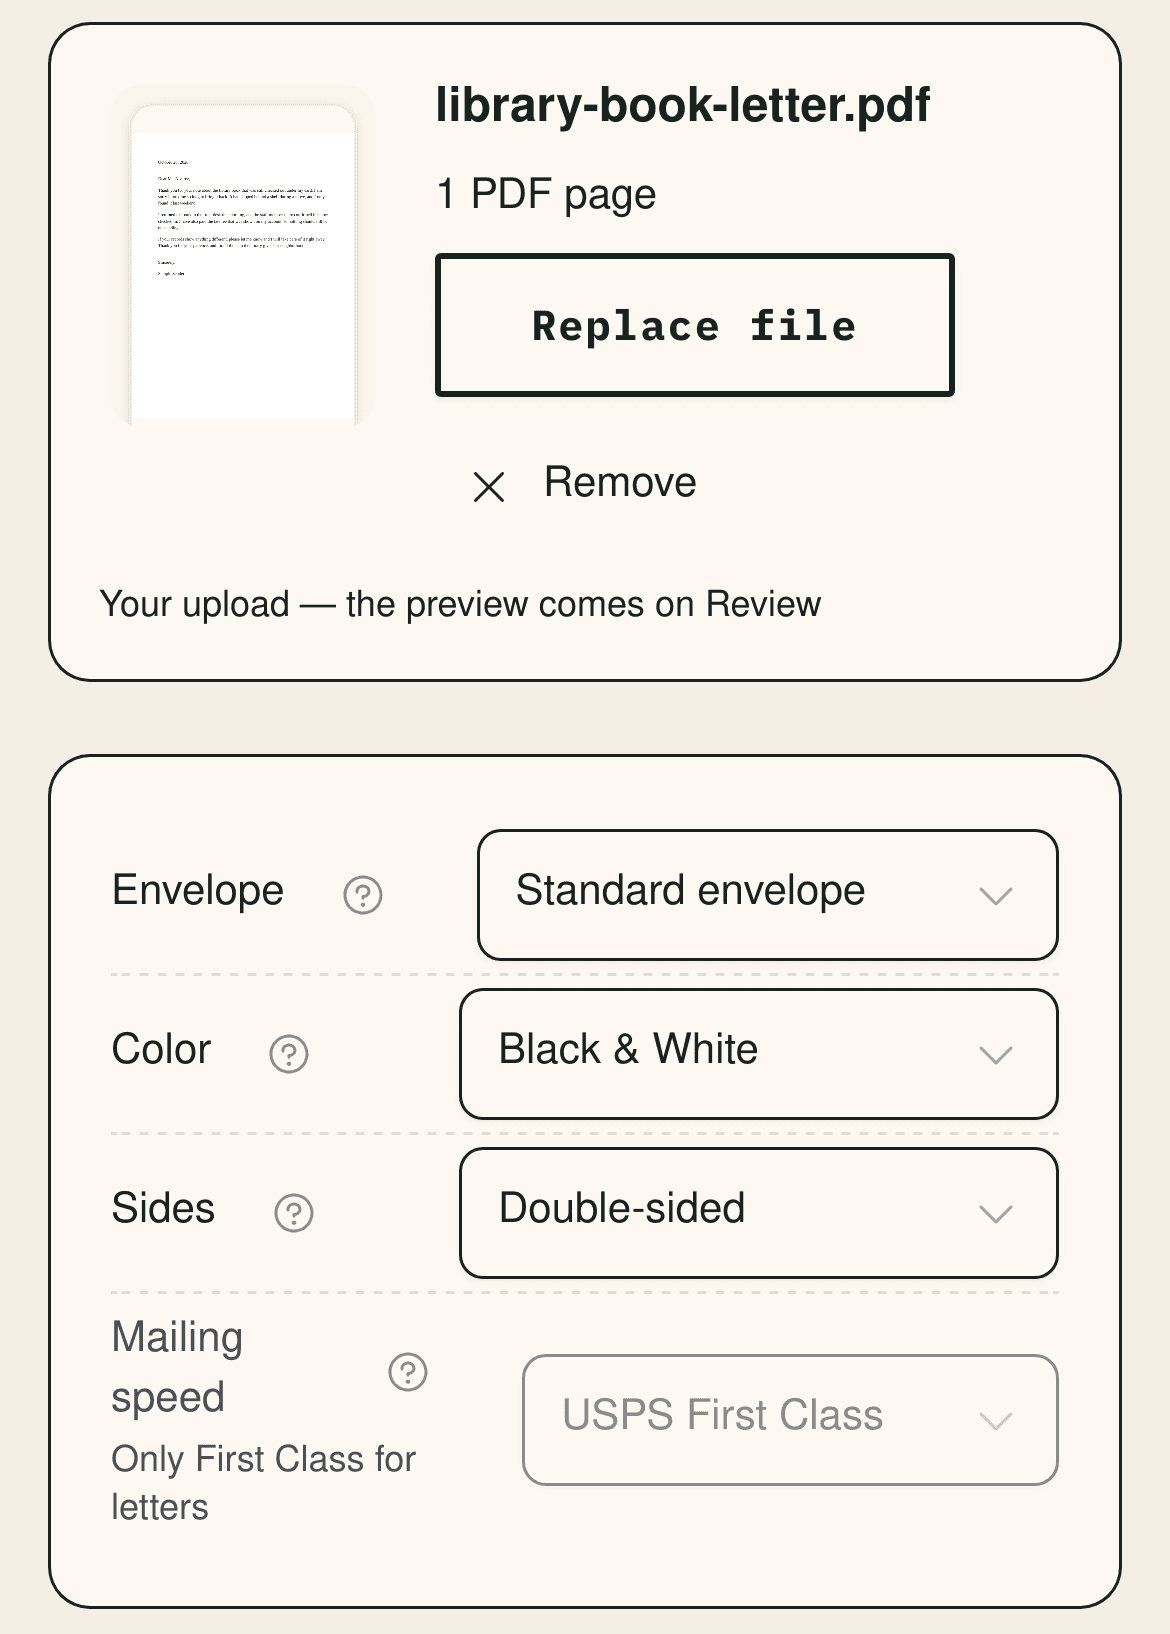
Once the file is in, the Document card shows a thumbnail, the file name and the page count, with Replace file and Remove. Choose black and white or color, and single- or double-sided printing; the running price shows at the foot of the screen.
3. Enter the addresses#
Type the recipient’s complete address and your US return address, then tap Save and verify. Review any suggested correction or warning, including a missing apartment or suite. Resolve blocked addresses before continuing; do not approve an unfamiliar correction merely to get past the step. An address marked Not verified needs a tap on Check address.
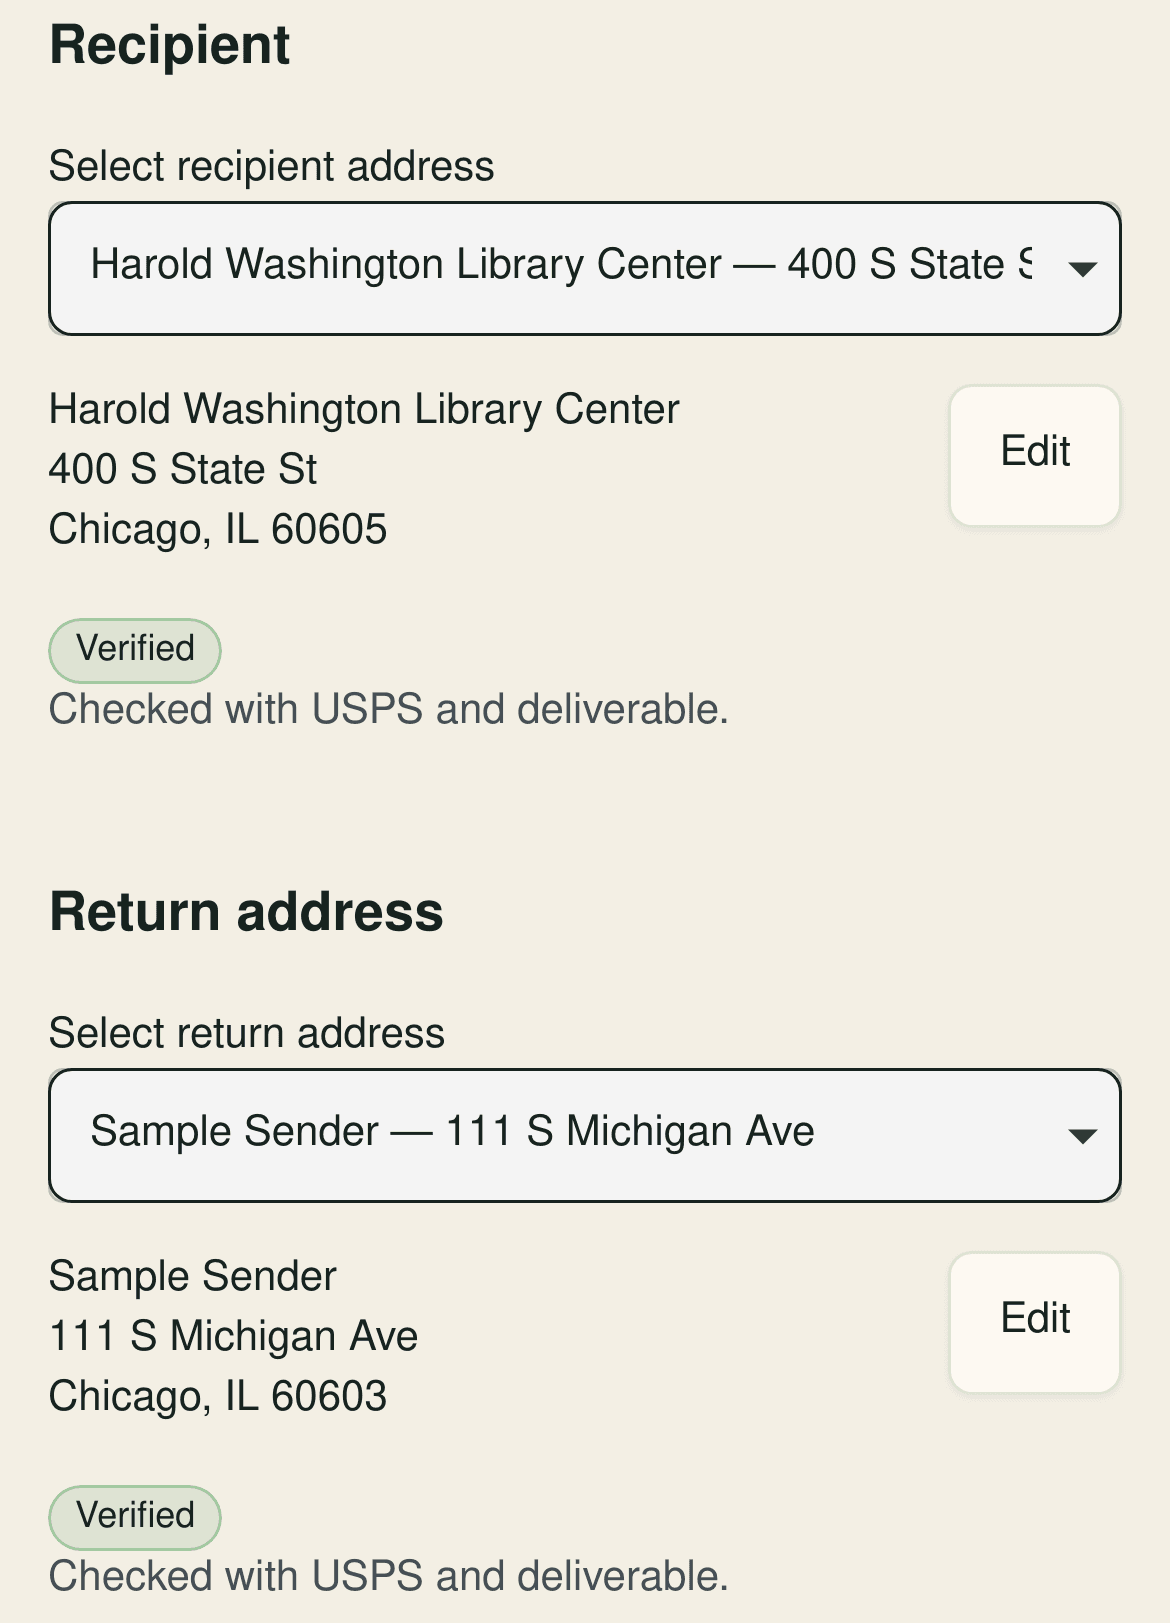
An address-check result does not prove that you selected the right recipient or guarantee delivery. Compare it with the actual mailing instructions. A form may display your own address even though the completed document must go to a processing office.
4. Check the preview and the total#
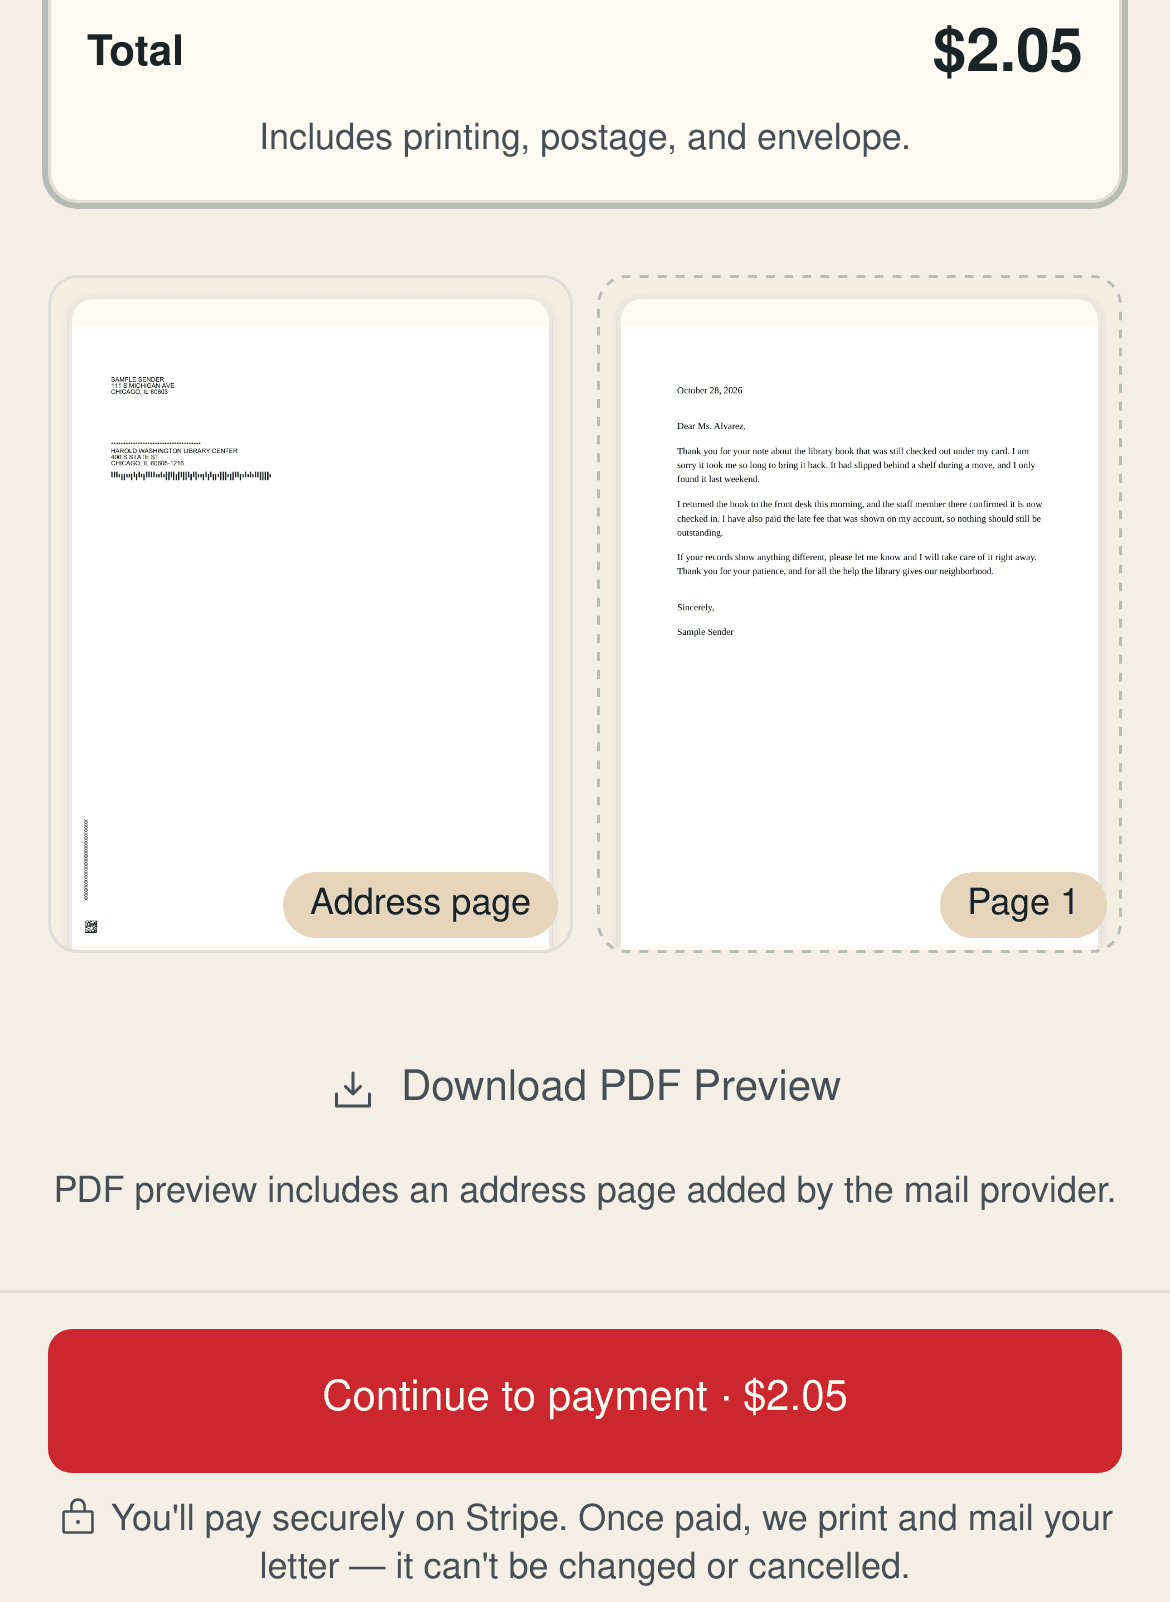
Review shows the Address page that Postmarkr adds in front of your document, then your pages. Tap a page to open it full size, or tap Download PDF Preview. Check that every page of your document follows the address page. One black-and-white page comes to $2.05, including the address page, envelope, First-Class postage and processing fee, and the payment button shows the same total.
If the upload or preview stops you
Cannot find the file? Save a local copy, give it a clear name, and reopen it from Files or Downloads before choosing it in the browser.
Wrong size, missing pages or a blank preview? Stop before payment. Re-export or rescan the source, then inspect every page. Use Fit and preview only when offered and the result is readable.
Password required or file rejected? Obtain an unprotected copy you are authorized to use. Follow the upload’s specific error; if it persists, keep the error message and contact support rather than repeatedly ordering the same file.
5. Pay#
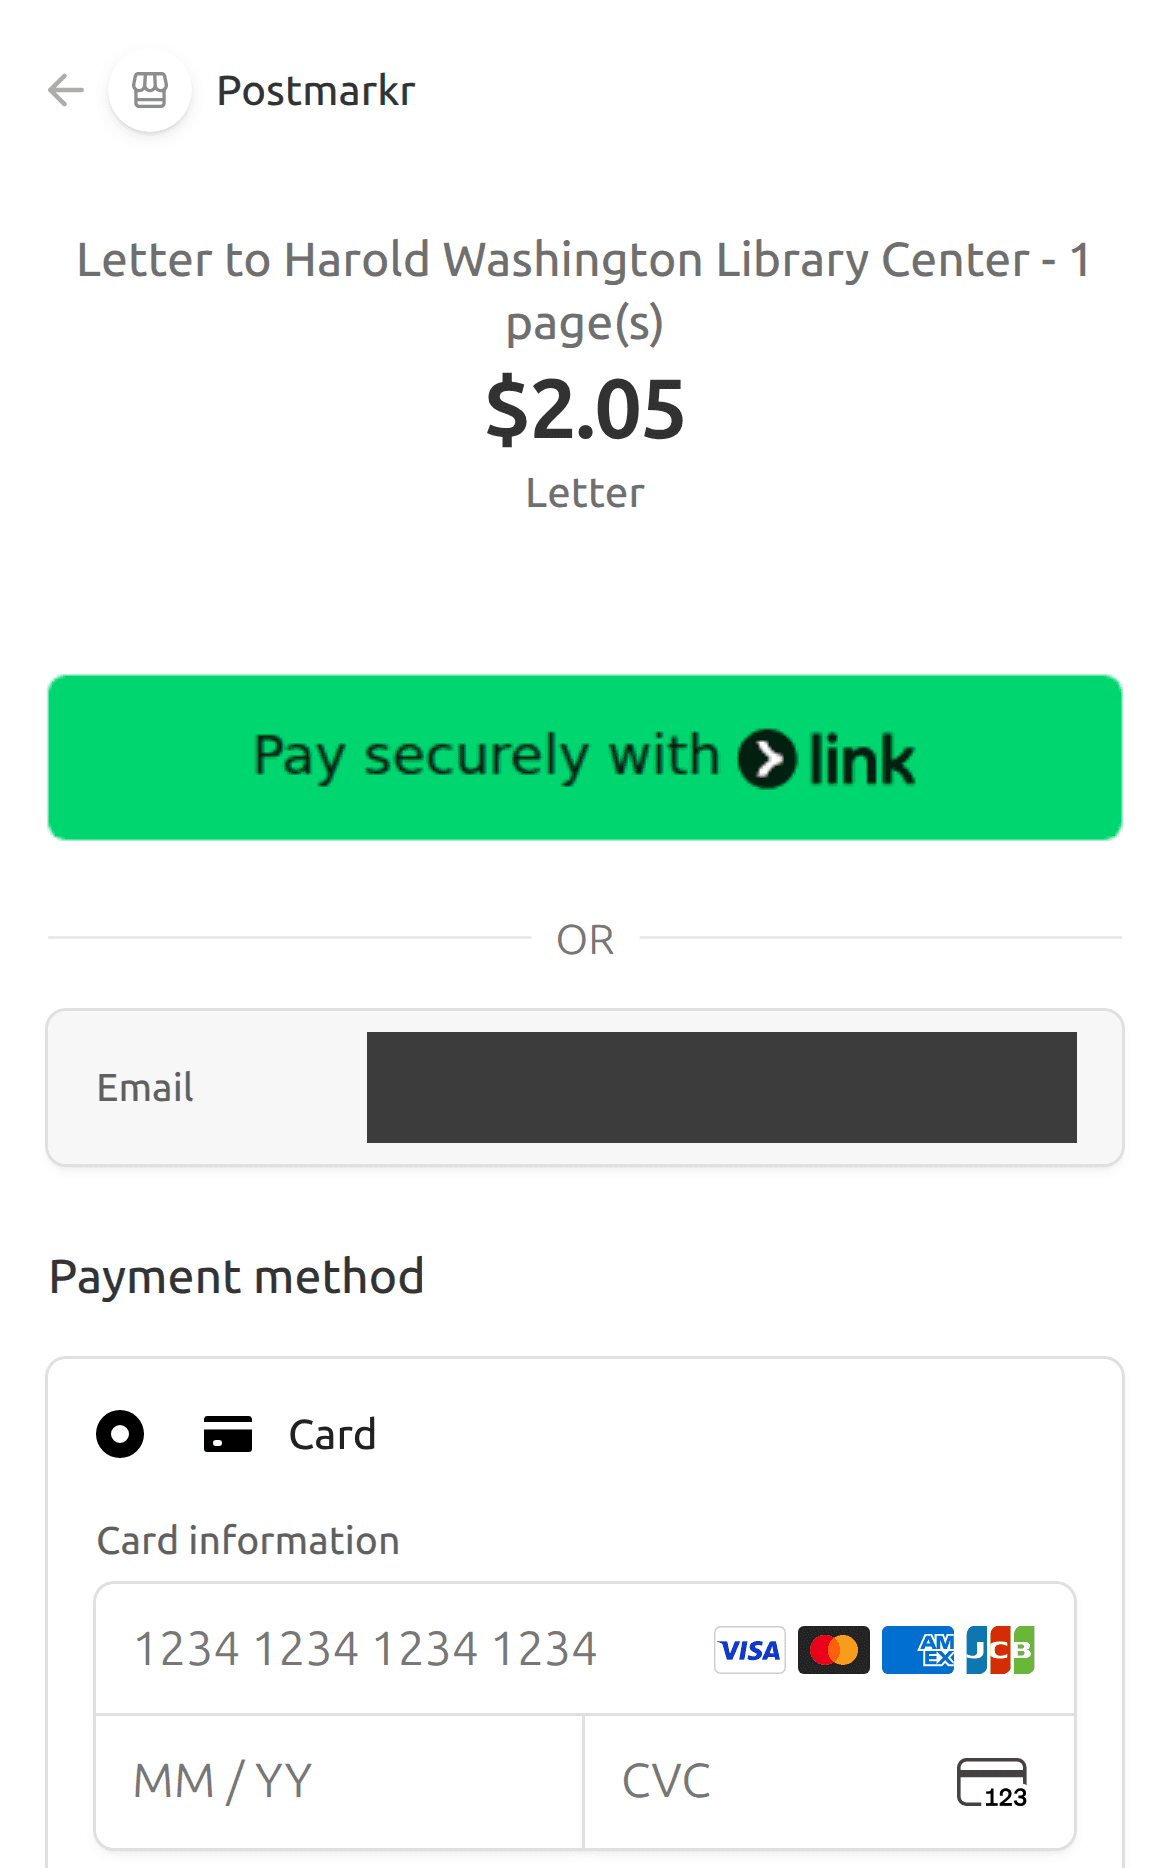
Tap Continue to payment and pay on Stripe’s checkout page; nothing is charged before that. Once you pay, the letter can’t be changed or cancelled. A payment receipt arrives by email, and we print the letter the next business day and mail it First-Class.
What it costs and when it arrives#
A one-page black-and-white document starts at $2.05, including the required address page, standard envelope, First-Class postage and processing fee. More pages, color and envelope choices change the total. Use pricing to estimate your letter, then check the final order total before payment.
Allow for processing and printing before postal transit. Payment confirmation is not confirmation that the letter has entered the mail. USPS lists a First-Class Mail delivery window of 1–5 days (opens in new tab); use the current order estimate and do not treat it as a guaranteed arrival date. The timing comparison explains the stages.
Use your order’s status record to see the processing events and carrier updates available for that letter. Some milestones are estimates, and scan information may be incomplete. The dashboard is not a signed receipt from the recipient.
Postmarkr mails to US addresses. Keep the order details if something goes wrong, and check the mailing process and support guidance for the next step. A missing scan alone does not establish that the letter was lost.
What Postmarkr can't do#
- Edit the letter on a phone. The letter editor and Word import need a desktop or laptop; on a phone, upload a PDF.
- Send Certified Mail or get a USPS receipt. The proof-of-mailing section below covers what to do instead.
- Mail outside the US. Both the recipient and the return address have to be in the US.
- Mail the original paper. An ink signature, a notarized page or a check needs the paper itself.
- Take payment without an account. You sign up first; guest checkout isn't offered.
Sending more than one letter#
For different documents, add each PDF as its own letter with its own addresses; up to 10 different letters fit in one Cart checkout. For the same document going to a list, use Bulk Send. Sending multiple letters at once explains the distinction and current limits. If you send for an executive, the executive-assistant guide explains how to keep each letter’s record.
When the letter needs proof of mailing#
Your Postmarkr dashboard is a processing record: what you sent, to whom, and how it moved through printing and mailing. It isn't a USPS receipt. Some leases, contracts and statutes say how a notice must be sent, so read the notice clause before you choose.
If the recipient requires Certified Mail, use a service that offers it; our Certified Mail guide explains the record. A Certificate of Mailing (opens in new tab) records when you present the item to USPS and must be purchased at the Post Office when you mail it. These services answer different proof questions.
Postmarkr sends First-Class letters only and doesn't send Certified Mail. When the notice clause calls for Certified Mail or a Certificate of Mailing, mail that letter at a Post Office counter; our guide to Certified Mail alternatives shows what each USPS option records.
When to use paper instead#
Mail the paper itself when the recipient needs an original: a wet-ink signature, a notarized document, or an enclosure such as a check. Check the recipient's instructions for signatures, notarization and mailing method before you send anything time-sensitive. For a signed contract, how to mail a signed contract covers whether to send a copy or the original, and who mails it.
Printing it yourself costs less in cash. At the published starting prices of Office Depot, FedEx Office and Staples (checked September 30, 2026), a black-and-white page and a stamp come to about $1.00 to $1.16 plus an envelope, against $2.05; where to print without a printer compares the options. Already printed and stamped? Mail it without going to the post office. If you need a same-day postmark, take the prepared letter to a Post Office counter and ask for a hand postmark; check the office’s opening hours first. If the recipient accepts an electronic submission, you may not need postal mail at all.
For everything else, such as a typed letter, an invoice, or a signed form the recipient accepts as a copy, your phone is enough: make the PDF, check it, upload it, and confirm the addresses.